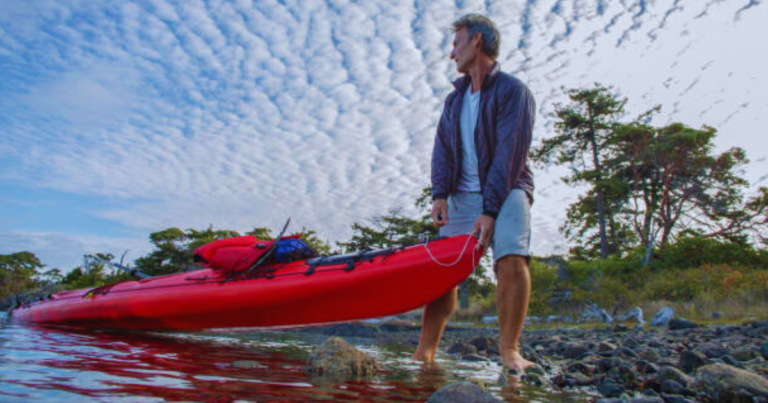
Ah, the thrill of gliding across the water in your trusty red kayak. There’s nothing quite like it, is there? But let me tell you, I learned the hard way that neglecting your kayak is a surefire way to turn your aquatic adventures into waterlogged nightmares. Did you know that with proper TLC, your red beauty can stay shipshape for up to 10 years or more? Yep, you heard that right a decade of smooth sailing (er, paddling).
I still cringe when I think about the time I left my kayak uncleaned after a salty ocean trip. Big mistake! When I finally got around to it weeks later, I was greeted by a crusty, sun-damaged mess that took hours to restore. Trust me, you don’t want to go down that path.
But fear not, fellow paddlers! Whether you’re a weekend warrior or a seasoned pro, I’m here to spill all the secrets I’ve picked up over years of trial and error (emphasis on the error). In this ultimate guide to red kayak maintenance, we’re diving deep into everything you need to know to keep your vessel in tip-top shape.
From essential cleaning hacks to sneaky storage tips, and even some DIY repairs that’ll make you feel like a bonafide kayak whisperer we’re covering it all. So grab your paddle (figuratively, of course), and let’s embark on this maintenance journey together. By the time we’re done, you’ll be armed with all the know-how to ensure your red kayak stays as vibrant and adventure-ready as the day you brought it home.
Table of Contents
Why Red Kayak Maintenance Matters?

I can’t stress this enough taking care of your red kayak isn’t just about keeping it pretty (though that’s a nice bonus). It’s about safety, performance, and making sure your investment doesn’t turn into a very expensive planter in your backyard.
I learned this the hard way when I ignored a small crack in my hull. It’s tiny, I thought. What’s the worst that could happen? Well, let me tell you that “tiny” crack turned into a big problem mid-rapids, and I ended up with a kayak full of water and a bruised ego.
Regular maintenance isn’t just about avoiding disasters, though. It’s about gliding through the water with ease, making every stroke count, and knowing your kayak has your back when you’re out there. Plus, a well-maintained kayak lasts longer, which means more adventures and less money spent on replacements. Trust me, your wallet will thank you.
Essential Tools for Red Kayak Maintenance
Alright, gear heads, it’s time to talk tools! Now, I know what you’re thinking Do I really need a whole toolbox just for my kayak? Well, not exactly, but having the right tools on hand can be a game-changer.
It’s a beautiful Saturday morning, you’re all set for a day on the water, and you notice a small hole in your kayak. Without the right repair kit, you’re sunk (pun intended). But with some epoxy and a fibreglass patch? You’ll be paddling in no time.
Here’s what I always keep in my maintenance kit:
- Biodegradable soap (because we love our waterways, right?)
- A couple of sponges and microfiber cloths
- A basic repair kit with epoxy and fibreglass patches
- Sandpaper (trust me, it comes in handy more often than you’d think)
- Protective gear like gloves and safety glasses
And don’t forget about storage equipment! A good kayak rack and cockpit cover can prevent a lot of damage before it even happens. Remember, an ounce of prevention is worth a pound of cure especially when it comes to kayaks.
Routine Cleaning: Keeping Your Red Kayak Sparkling

Okay, I’ll admit it I used to be terrible at cleaning my kayak. It’s just going to get dirty again, I’d tell myself. But let me tell you, the day I started giving my red beauty a proper scrub-down after each trip was the day I fell in love with kayaking all over again.
Here’s the deal: a quick rinse isn’t enough. Salt, algae, and all sorts of gunk can build up over time, eating away at your kayak’s finish and potentially causing damage. But don’t worry, I’ve got a foolproof cleaning routine that’ll keep your kayak looking fresh without taking up your whole day.
Start with a good rinse to get rid of any loose dirt. Then, grab your biodegradable soap and give your kayak a gentle scrub. Pay extra attention to those nooks and crannies they’re breeding grounds for mould and mildew. For stubborn stains (we’ve all had them), a mix of vinegar and water can work wonders.
The real secret? Drying your kayak properly. I like to flip mine over and let it air dry completely before storing it. Trust me, a little extra time drying can save you a lot of headaches down the road.
Inspecting Your Red Kayak: What to Look For
You’re out on the water, miles from shore, when you notice your kayak handling a bit… off. Suddenly, you spot a crack you hadn’t noticed before. This scenario is exactly why regular inspections are crucial.
I make it a habit to give my kayak a once-over before and after each trip. It might sound like overkill, but it’s saved my bacon more than once. Here’s what I look for:
First, I check the hull for any signs of damage. Cracks, dents, or deep scratches can compromise your kayak’s integrity. Don’t forget to look inside, too.
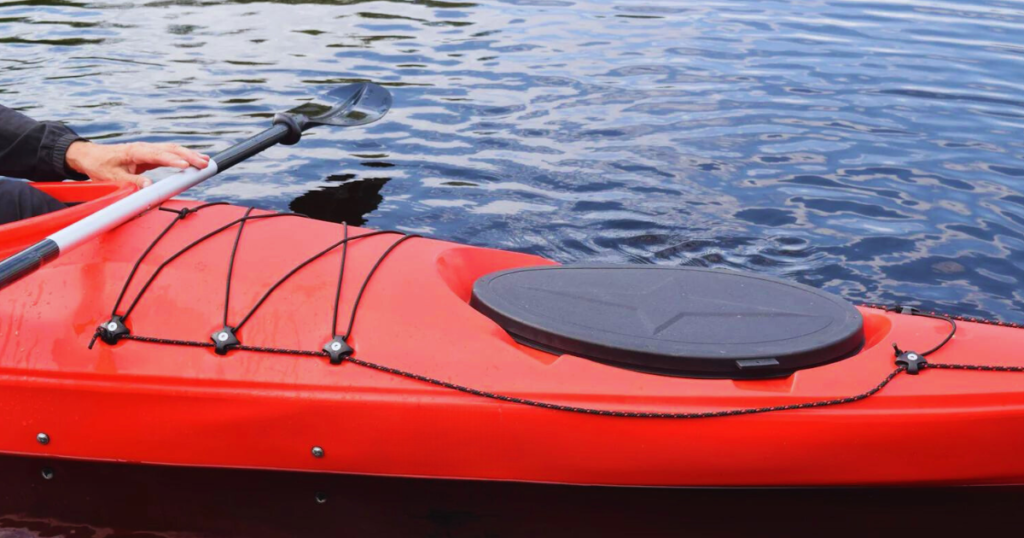
Next, I inspect all the lines and bungees. These can wear out over time, and trust me, you don’t want a bungee snapping when you’re trying to secure your gear.
I also pay close attention to the seat and footrests. An uncomfortable paddle can ruin even the most beautiful day on the water.
Lastly, I always check the hatch covers. A leaky hatch can turn your dry storage into a soggy mess real quick.
DIY Repairs: Fixing Common Red Kayak Issues
Alright, DIY enthusiasts, this section’s for you! Now, I’m not saying you should attempt major surgery on your kayak, but there are plenty of small repairs you can handle yourself with a bit of know-how.
Take it from someone who once duct-taped a crack (spoiler alert: it didn’t end well) learning some basic repair skills can be a real lifesaver. Here are a few common issues I’ve learned to tackle on my own:
Small holes and cracks? No problem! With some epoxy and a fibreglass patch, you can seal these up like a pro. Just make sure the area is clean and dry before you start.
Worn-out deck lines are another easy fix. I replace mine every couple of years to ensure they’re always ready for action.
Hatch covers can be tricky, but with a bit of patience, you can usually repair or replace them yourself. Just make sure you get the right size.
And let’s talk about gel coat damage. Those little scratches and dings might seem harmless, but they can lead to bigger problems if left unchecked. A bit of gel coat repair isn’t too hard once you get the hang of it.
Protecting Your Red Kayak’s Color and Finish
Let’s face it – we all want our kayaks to look good. And there’s nothing quite like the vibrant red of a well-maintained kayak, am I right? But keeping that colour looking fresh isn’t just about vanity it’s about protecting your kayak from the elements.
I learned this lesson the hard way when I left my kayak out in the sun for a whole summer. By fall, that beautiful red had faded to a sad pink. Don’t be like me protect your kayak’s finish.
UV protection is key. I always apply a UV-resistant spray to my kayak at the start of each season. It’s like sunscreen for your boat.
Waxing might seem like overkill, but trust me, it makes a difference. Not only does it make your kayak look shiny and new, but it also provides an extra layer of protection against the elements.
For minor scratches and scuffs, a bit of touch-up paint can work wonders. Just make sure you match the colour correctly nobody wants a polka-dot kayak (unless that’s your thing, in which case, rock on).
Seasonal Maintenance: Preparing for Different Conditions

As a year-round paddler, I’ve learned that each season brings its own set of challenges for kayak maintenance. But with a little preparation, you can keep your red beauty ready for action no matter what Mother Nature throws your way.
Spring is all about getting back in the game. I always start with a thorough inspection, checking for any damage that might have occurred during winter storage. It’s also a great time to re-apply that UV protective spray we talked about earlier.
Summer is peak paddling season, which means your kayak is working overtime. I make sure to rinse my kayak after every trip (especially after saltwater adventures) and keep an eye out for sun damage.
Fall is when I start thinking about winter prep. I’ll do any necessary repairs now, while the weather’s still good. It’s also a great time to reapply sealants and double-check all your gear.
Winter is the real test for kayak maintenance. If you’re storing your kayak for the season, make sure it’s clean and completely dry before putting it away. And if you’re one of us, crazy winter paddlers, be extra vigilant about drying your kayak to prevent freeze damage.
Transporting Your Red Kayak Safely
Getting your kayak to and from the water safely is just as important as maintaining it. Trust me, I’ve seen some hair-raising kayak transport situations on the highway, and it’s not pretty!
First, invest in a good quality kayak rack or trailer. I learned this lesson the hard way when my DIY pool noodle rack solution failed spectacularly on the freeway. Luckily, my kayak survived, but my pride? Not so much.
The proper tie-down technique is crucial. I always use cam straps – they’re easy to use and won’t damage your kayak like ratchet straps can. And remember, snug is good, but too tight can warp your kayak.
Don’t forget about protecting your kayak from road debris. A simple cockpit cover can prevent your kayak from becoming a giant bug catcher on the highway.
Always do a quick inspection before and after transport. Check your straps, look for any new dings or scratches, and make sure everything’s still ship-shaped.
When to Seek Professional Help?
Look, I get it. We all want to be self-sufficient kayak maintenance gurus. But sometimes, you’ve got to know when to call in the pros. Trust me, I learned this lesson the hard way when my DIY repair job turned into a leaky disaster mid-river.
So, when should you wave the white flag and seek professional help? Here are a few signs I’ve learned to watch for:
If you spot any deep cracks or holes, especially near the seams, it’s time to call in reinforcements. These types of damages can compromise the structural integrity of your kayak, and that’s not something you want to mess around with.
Finding yourself constantly pumping water out of your kayak? That’s a red flag. A persistently leaky kayak often indicates a problem that’s beyond the scope of basic DIY repairs.
If your kayak’s shape seems off maybe it’s warped or dented in a way you can’t fix that’s definitely a job for the pros.
And here’s a biggie: any damage to your kayak’s core material. If you can see foam or wood that should be covered by the outer layer, don’t pass go, don’t collect $200 go straight to a professional.
When it comes to finding a reputable repair service, word of mouth is gold. Ask around at your local paddling club or outdoor gear store. And don’t be afraid to ask questions about their experience with your specific type of kayak.
As for cost, well, it can vary widely depending on the damage. But here’s how I look at it: professional repairs might sting the wallet a bit, but they’re usually cheaper than replacing your kayak entirely. Plus, you can’t put a price on peace of mind when you’re out on the water.
Conclusion
Well, fellow paddlers, we’ve navigated the waters of red kayak maintenance together, and I hope you’re feeling ready to tackle whatever comes your way. Remember, taking care of your kayak isn’t just about keeping it pretty (though that’s a nice bonus) it’s about safety, performance, and making sure your trusty vessel is always ready for your next adventure. From regular cleaning to proper storage, and even knowing when to call in the pros, you’re now armed with the knowledge to keep your red beauty in shipshape condition.
Frequently Asked Questions About Red Kayak Maintenance
How often should I clean my red kayak?
I recommend giving your kayak a quick rinse after every use, especially if you’ve been paddling in saltwater. For a more thorough cleaning, aim for once a month during the paddling season. Trust me, your kayak will thank you.
Can I use regular household cleaners on my red kayak?
I made this mistake once and regretted it. Stick to mild, biodegradable soaps specifically designed for boats. Regular household cleaners can damage the finish and are harmful to the environment. Remember, what goes on your kayak ends up in our waterways.
How do I remove stubborn stains from my red kayak?
I’ve battled my fair share. For tough stains, I’ve had great success with a mixture of warm water and white vinegar. For really stubborn marks, a magic eraser can work wonders. Just be gentle to avoid damaging the finish.
Is it okay to store my red kayak outside?
While indoor storage is ideal, I know it’s not always possible (trust me, my garage is proof of that). If you must store your kayak outside, invest in a good quality cover and keep it off the ground. Also, try to find a spot that’s out of direct sunlight to prevent UV damage.
How do I know if my red kayak needs professional repairs?
Great question! If you notice deep cracks, or significant warping, or if your kayak is taking on water, it’s time to call in the pros. I once tried to fix a major crack myself and… let’s just say it didn’t end well. When in doubt, consult an expert.
Can I paint my red kayak a different colour?
Thinking of a change, huh? While it is possible to paint your kayak, it’s not a simple DIY job. It requires specific marine-grade paint and careful preparation. If you’re set on a colour change, I’d recommend consulting a professional to ensure it’s done right.
How often should I wax my red kayak?
In my experience, waxing your kayak once or twice a year is sufficient. I usually do it at the start of the paddling season and again halfway through. It not only makes your kayak look great but also adds an extra layer of protection.
What’s the best way to transport my red kayak in my car?
I always use a proper kayak rack with cam straps. Avoid ratchet straps as they can overtighten and damage your kayak. And here’s a pro tip: use bow and stern lines for extra security on long trips. I learned that one the hard way on a windy highway.
How do I prevent sun damage to my red kayak?
The sun can be brutal on kayaks, can’t it? I always apply a UV-protectant spray at the start of each season. When you’re not using your kayak, store it in a shaded area or use a cover. And if you’re feeling fancy, a coat of marine wax can add extra protection.
Can I use my red kayak in winter?
Winter paddling can be amazing, but it does require extra care for your kayak. The biggest concern is preventing freeze damage. Always thoroughly dry your kayak after use, and store it in a place where it won’t be exposed to freezing temperatures. And please, be extra cautious about safety in cold water.

Nigel Foster, born in 1952, is an esteemed sea kayaker, known for being the youngest to kayak around Iceland. His journey in kayaking started at 15 in Brighton, England. With a career beginning as a trainee instructor in Sussex, he later pursued teaching after attending Redland College, Bristol.
Foster’s notable expeditions include navigating the challenging waters of Newfoundland and the Hudson Strait. Despite facing intense conditions, his passion for kayaking never waned. He holds several British Canoe Union qualifications and has significantly contributed to the kayaking community through teaching and committee work.
In 1985, Foster expanded his horizons by assisting an expedition in Iceland and later founded his own kayaking business, sharing his expertise globally.